Using cloud-init with SmartOS

SmartOS provides the ability to inject cloud-init data into a zone/VM. This is extremely useful for automating some of the menial tasks one would normally have to perform manually like setting up users, installing packages, or pulling down a git repo. Basically, anything you can stuff into cloud-init user-data is at your disposal.

However, since SmartOS zone definitions are in JSON and cloud-init data is in yaml, it’s not immediately obvious how to supply this information. What it boils down to is, escape all double-quotes (“) and line-feeds.

Here’s our cloud-init config which creates a new user and import their ssh key from launchpad.net.

#cloud-config

users:
  - default
  - name: shaner
    ssh_import_id: shaner
    lock_passwd: false
    sudo: "ALL=(ALL) NOPASSWD:ALL"
    shell: /bin/bash

So following the above escape rules above, here’s our full SmartOS zone spec, including the cloud-init data. Note the cloud-init:user-data key.

{
  "brand": "kvm",
  "alias": "ubuntu-xenial",
  "ram": "2048",
  "vcpus": "2",
  "resolvers": [
    "192.168.1.1",
    "1.1.1.1"
  ],
  "nics": [
    {
      "nic_tag": "admin",
      "ip": "192.168.1.50",
      "netmask": "255.255.255.0",
      "gateway": "192.168.1.1",
      "model": "virtio",
      "primary": true
    }
  ],
  "disks": [
    {
      "image_uuid": "429bf9f2-bb55-4c6f-97eb-046fa905dd03",
      "boot": true,
      "model": "virtio"
    }
  ],
  "customer_metadata": {
    "cloud-init:user-data": "#cloud-config\n\nusers:\n  - default\n  - name: shaner\n    ssh_import_id: shaner\n    lock_passwd: false\n    sudo: \"ALL=(ALL) NOPASSWD:ALL\"\n    shell: /bin/bash"
  }
}

Let’s go ahead and create the zone on our SmartOS box.

[root@vmm01 /opt/templates]# vmadm create < ubuntu-xenial.json
Successfully created VM 0e908925-600a-4365-f161-b3a51467dc08
[root@vmm01 /opt/templates]# vmadm list 
UUID                                  TYPE  RAM      STATE             ALIAS
0e908925-600a-4365-f161-b3a51467dc08  KVM   2048     running           ubuntu-xenial

After a bit of time, we can try logging in as our new user we requested. Recall, we asked cloud-init to pull in our public ssh key from launchpad so, if you get prompted for a password, something is wrong.

shaner@tp25:~$ ssh 192.168.1.50
The authenticity of host '192.168.1.50 (192.168.1.50)' can't be established.
ECDSA key fingerprint is SHA256:hFPjwUJjd7N/Gb9EE37fTVt2Lk6NVzoLKvhFN7wYw2M.
Are you sure you want to continue connecting (yes/no)? yes
Warning: Permanently added '192.168.1.50' (ECDSA) to the list of known hosts.
Welcome to Ubuntu 16.04.3 LTS (GNU/Linux 4.4.0-116-generic x86_64)
Certified Ubuntu Cloud Image

   __        .                   .
 _|  |_      | .-. .  . .-. :--. |-
|_    _|     ;|   ||  |(.-' |  | |
  |__|   `--'  `-' `;-| `-' '  ' `-'
                   /  ;  Instance (Ubuntu 16.04.3 LTS 20180222)
                   `-'   https://docs.joyent.com/images/linux/ubuntu-certified
                         http://www.ubuntu.com/cloud#joyent

 * Documentation:  https://help.ubuntu.com
 * Management:     https://landscape.canonical.com
 * Support:        https://ubuntu.com/advantage

  Get cloud support with Ubuntu Advantage Cloud Guest:
    http://www.ubuntu.com/business/services/cloud

0 packages can be updated.
0 updates are security updates.


The programs included with the Ubuntu system are free software;
the exact distribution terms for each program are described in the
individual files in /usr/share/doc/*/copyright.

Ubuntu comes with ABSOLUTELY NO WARRANTY, to the extent permitted by
applicable law.

shaner@0b8d7a26-ffe4-e859-eb56-d96d02bf213e:~$ sudo ls
shaner@0b8d7a26-ffe4-e859-eb56-d96d02bf213e:~$ sudo apt-update && sudo apt-upgrade -y

There’s a LOT you can do with cloud-init data. See the below links for more info.

Cloud-init examples: https://cloudinit.readthedocs.io/en/latest/topics/examples.html
Joyent Datasource: https://github.com/number5/cloud-init/blob/master/cloudinit/sources/DataSourceSmartOS.py
Joyent Ubuntu Image documentation: https://docs.joyent.com/public-cloud/instances/virtual-machines/images/linux/ubuntu-certified

Deploying Graylog and Filebeat for Suricata event logging using Juju

I <3 graylog and with graylog 3.0 almost GA, it promises to be even better. In this post (part of a multi-post series) I’ll walk you through setting up Graylog to ingest logs from Suricata.

First, let’s install graylog. While there are almost too many ways to deploy software these days, I’ve been playing with Juju lately, so that’s what I’ll use here to deploy graylog, mongodb, and elasticsearch into individual lxd containers. As we’ll be deploying to our local machine for demonstration purposes, I’ve already installed lxd (snap install lxd) and the juju client (snap install juju).

Let’s bootstrap our juju controller and deploy our charm bundle.

shaner@tp25:~$ juju bootstrap

Select a cloud [localhost]:       

Enter a name for the Controller [localhost-localhost]: lxd

Creating Juju controller "lxd" on localhost/localhost
Looking for packaged Juju agent version 2.4.7 for amd64
To configure your system to better support LXD containers, please see: https://github.com/lxc/lxd/blob/master/doc/production-setup.md
Launching controller instance(s) on localhost/localhost...
 - Retrieving image: rootfs: 100% (394.82kB/s)s)
Installing Juju agent on bootstrap instance
Fetching Juju GUI 2.14.0
Waiting for address
Attempting to connect to 10.131.74.104:22
Connected to 10.131.74.104
Running machine configuration script...
Bootstrap agent now started
Contacting Juju controller at 10.131.74.104 to verify accessibility...
Bootstrap complete, "lxd" controller now available
Controller machines are in the "controller" model
Initial model "default" added

OK, our juju controller is bootstrapped and a default model has been added. Let’s proceed with deploying our software stack. Below is our charm bundle, copy into a file called graylog.yaml .

applications:
  graylog:
    charm: 'cs:graylog-23'
    num_units: 1
    series: bionic
    to:
      - '0'
  elasticsearch:
    charm: 'cs:elasticsearch-32'
    num_units: 1
    series: bionic
    to:
      - '1'
  mongodb:
    charm: 'cs:mongodb-51'
    num_units: 1
    series: bionic
    to:
      - '2'
relations:
  - - 'mongodb:database'
    - 'graylog:mongodb'
  - - 'elasticsearch:client'
    - 'graylog:elasticsearch'
machines:
  '0': {}
  '1': {}
  '2': {}

Now we can deploy it using juju.

shaner@tp25:~$ juju deploy graylog.yaml
Resolving charm: cs:elasticsearch-32
Resolving charm: cs:graylog-23
Resolving charm: cs:mongodb-51
Executing changes:
- upload charm cs:elasticsearch-32 for series bionic
- deploy application elasticsearch on bionic using cs:elasticsearch-32
- upload charm cs:graylog-23 for series bionic
- deploy application graylog on bionic using cs:graylog-23
  added resource graylog
- upload charm cs:mongodb-51 for series bionic
- deploy application mongodb on bionic using cs:mongodb-51
- add new machine 3 (bundle machine 0)
- add new machine 4 (bundle machine 1)
- add new machine 5 (bundle machine 2)
- add relation mongodb:database - graylog:mongodb
- add relation elasticsearch:client - graylog:elasticsearch
- add unit elasticsearch/1 to new machine 4
- add unit graylog/1 to new machine 3
- add unit mongodb/0 to new machine 5
Deploy of bundle completed.
shaner@tp25:~$

We can watch the status of the deployment using ‘watch -c juju status –color’. Here’s what that might look like:

Waiting for juju to finish deploying our stack.

When complete, it’ll look something like this:

Juju has finished deploying our stack.

Now that graylog is up and running, we should be able to access the WebUI at the IP address show in the ‘juju status’ output. However, we need to get the admin password first. We’ll run the charm action below to get it:

shaner@tp25:~$ juju run-action --wait graylog/1 show-admin-password
unit-graylog-1:
  id: 188f2eda-2293-462d-8536-ded94afad957
  results:
    admin-password: zL9dkq3c6BMtrfqbyn
  status: completed
  timing:
    completed: 2018-12-21 03:58:05 +0000 UTC
    enqueued: 2018-12-21 03:58:04 +0000 UTC
    started: 2018-12-21 03:58:05 +0000 UTC
  unit: graylog/1

Now armed with the password and the IP of our graylog server go ahead and open a web browser to http://<ip_address>:9000. You should see something like this:

Logging into graylog.

Switching gears a bit, we need to go setup Suricata. To do this, we’ll go ahead and launch a new lxd container using the Ubuntu and Filebeat charms, adding the Juju relations where necessary.

shaner@tp25:~$ juju deploy ubuntu
Located charm "cs:ubuntu-12".
Deploying charm "cs:ubuntu-12".
shaner@tp25:~$ juju deploy filebeat
Located charm "cs:filebeat-20".
Deploying charm "cs:filebeat-20".
shaner@tp25:~$ juju add-relation filebeat:beats-host ubuntu
shaner@tp25:~$ juju add-relation filebeat graylog
shaner@tp25:~$ juju config filebeat logpath=/var/log/suricata/eve.json

Using the power of Juju, filebeat will automatically configure a graylog Input and start sending our Suricata logs from /var/log/suricata/eve.json to it. We can see it did so here:

All that’s left now is to login to the container and setup Suricata.

shaner@tp25:~$ juju ssh ubuntu/0
ubuntu@juju-b43ea2-6:~$ apt-get install -y suricata filebeat

Because this is a demo and we’re in an unprivileged container, we’ll configure Suricata to use the good old pcap method for packet acquisition.

sed -i 's/LISTENMODE=nfqueue/LISTENMODE=pcap/g' /etc/default/suricata

Awesome, we’re ready to start things up.

root@juju-b43ea2-6:~# systemctl enable suricata filebeat
root@juju-b43ea2-6:~# systemctl start suricata filebeat

Go ahead and kick off an HTTP connection to generate some traffic for Suricata to see.

root@juju-b43ea2-3:~# curl -s https://www.google.com > /dev/null

If we did everything right, we should be able to switch back to the Graylog WebUI and click on ‘Search’ at the top and see some messages coming in.

You’ll notice however, the message field is one big jumble of JSON text. We’ll want to configure extractors in order to map the JSON message string coming in from filebeat to actual fields in graylog.

Go ahead navigate back to ‘System’->’Inputs’ and click on ‘Manage extractors’ for the input you just created. Then click on ‘Get Started’ button and load a message to work with.

Click on ‘Get Started’.

Once you load a message from the input, you’ll want to scroll down to the ‘message’ field and select a new JSON extractor.

After you’ve clicked on ‘JSON’ from the drop down menu, scroll to the bottom of the page and after giving it a title, click ‘Create extractor’.

Switch back to you Ubuntu container and re-issue our curl command to generate some more traffic. Afterwards, switch back to graylog WebUI and go back to the Search dashboard. You should now see the the different JSON values being mapped to their respective fields.

In our next article, we’ll dive into setting up Streams, pipelines, and more.

Thanks for reading!

SmartOS on Alix APU2c2

Over the past few years, I’ve been using SmartOS as my hypervisor of choice coupled with a management layer called Project-Fifo. I have to say, it’s been a joy to work with.

I had a couple Alix APU’s laying around and was curious how well SmartOS would run it.

To begin, I downloaded the SmartOS USB image and pushed onto a USB drive.

wget https://us-east.manta.joyent.com/Joyent_Dev/public/SmartOS/smartos-latest-USB.img.bz2

bzcat smartos-latest-USB.img.bz2 | dd of=/dev/sdb conv=fdatasync

Now,  we can plug the USB drive into the USB port of our APU then power it up. Be sure to plug in your serial cable first so you can see what’s going on.

Soon as you see the GRUB boot menu, press ‘c’ enter the below to switch the console output to ttya from vga. Then hit enter.

variable os_console ttya

After doing the above, you should see something like this

And eventually this. You can now follow along and configure your new SmartMachine.

After networking is all configured, you’ll be prompted to layout a zpool on your disk (hopefully you have an m-sata installed).

Now, just hit enter and be sure to remove the USB drive so SmartOS will boot from the m-sata drive. Eventually, you’ll be presented with the login screen like the below where you can login as root using the password you provided during setup.

Okay, so let’s import a debian dataset and spin up a zone (read: container)

Define the zone config and use vmadm to create it and login!

Cool! A fully functioning Debian 9 container. Let’s setup wordpress and run a load test for funsies.


Now, let’s use Siege to perform some load testing

Not Bad!

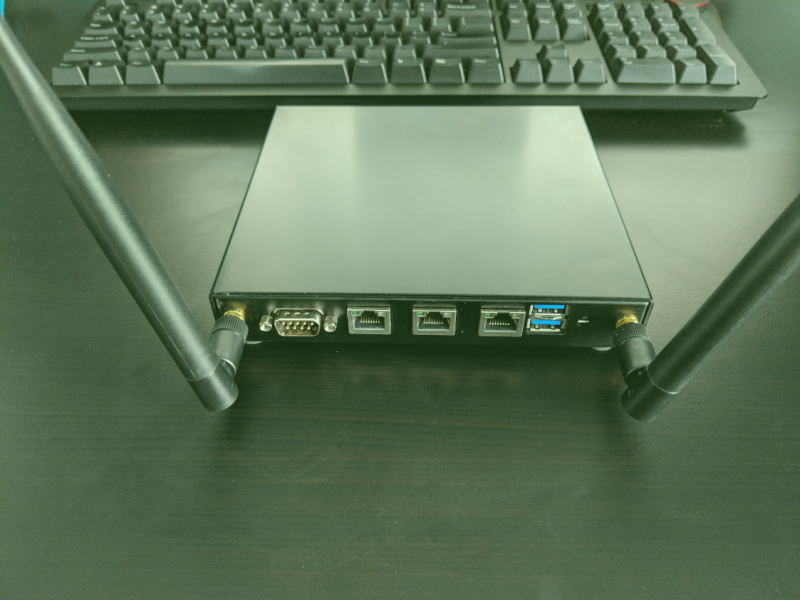
Adding WiFi Card to Alix apu Running pfSense

I always thought it would be neat to manage my home WiFi from the same interface as the rest of my network. After eyeing the hardware for a long time and doing some research every couple months or so, I finally made the leap and purchased the necessary hardware.

As I’m using an Alix apu2c2, some initial research showed that the WLE200NX coupled with a pair of 6dBi antennas was the way to go. 

After backing up my pfSense config (ALWAYS make a backup!) I shut it down and cracked it open to install the WiFi card.

This was mostly trivial, note that we use the third (mPCIe 1) slot for this. The first slot is for an mSATA drive.

All set, ready to power up and get it configured!

Head over to Interfaces -> Assignments then down to the Wireless tab. Click Add, select the detected device and set the mode to ‘Access Point‘. Then, click Save.

Head back to Interfaces -> Assignments and create a new interface, selecting new WiFi device.


Now, click on the newly created interface (OPT1, likely) and configure it like any other interface. Note, because it’s a wireless interface, you’re presented with a LOT more options as your scroll further down. Here’s, where you configure Channel, SSID, WPA2, etc…

Once you have everything configured, head over to Services -> DHCP Server and configure the DHCP server for your new interface.

Okay, just about done. All we have to do now is let traffic pass through the interface. To do so, head over to Firewall -> Rules and click your new WiFi interface. Below, you see I just added a quick ‘Allow All’ rule to make sure everything works as expected.

Testing this with both my phone and my laptop, I couldn’t be happier with the results!

Change theme for project-fifo Web UI

Exploring more of Project-Fifo, I happened upon this gem.  You can change the web UI theme!

Log into your fifo server and edit /opt/local/fifo-cerberus/config/config.js then simply set the theme to dark.

var Config = {
    theme: "dark"
};

Clear your browser cache and reload the WebUI. Here’s what it will look like.

If you want to customize the theme further, you can edit /opt/local/fifo-cerberrus/css/dark.css (if you’re using the dark theme). If you want to edit the default theme, you’d want to edit /opt/local/fifo-cerberrus/css/style.css .